
Solution 1: Disable Quick Access and Set Open File Explorer to This PC
In most cases, Quick access can make it easier and faster to open a folder. However, this can be the cause that Windows 10 Explorer keeps crashing. Therefore, you can try disabling Quick access to fix the problem. Here is the tutorial:
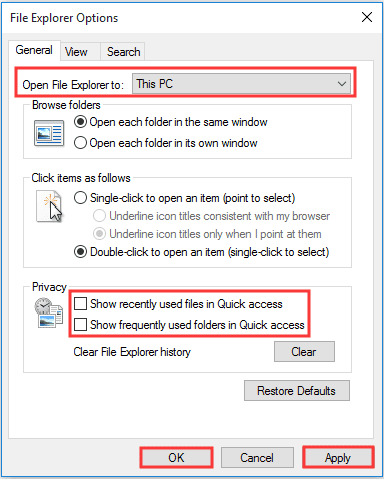
Step 1: Open File Explorer Options and then go to the General tab.
Step 2: Set Open File Explorer to This PC instead of Quick access.
Step 3: Uncheck both Show recently used files in Quick access and Show frequently used folders in Quick access under the Privacy section. Click Apply and OK to save changes.
Solution 2: Check Account Permission
If you notice that Windows 10 Explorer keeps crashing when you try to access a specific folder, then you’d better check if you have the full permission over this folder. Follow the instructions below to do that:
Step 1: Open File Explorer, then right-click the folder you want to make changes to choose Properties.
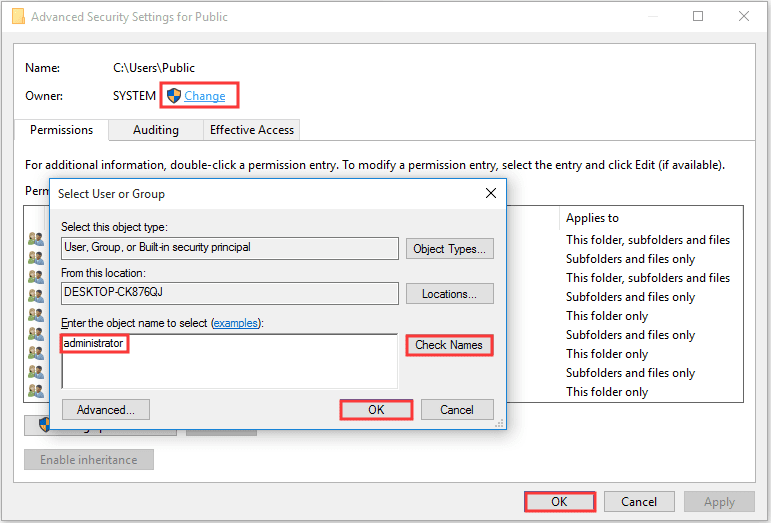
Step 2: Go to the Security tab and then choose Advanced.
Step 3: Click Change next to Owner, and then input administrator (your user account) in the box under the Enter the object name to select section. Click Check Names to make sure that the name is right. Click OK to exit Select User or Group and then click OK to save changes.
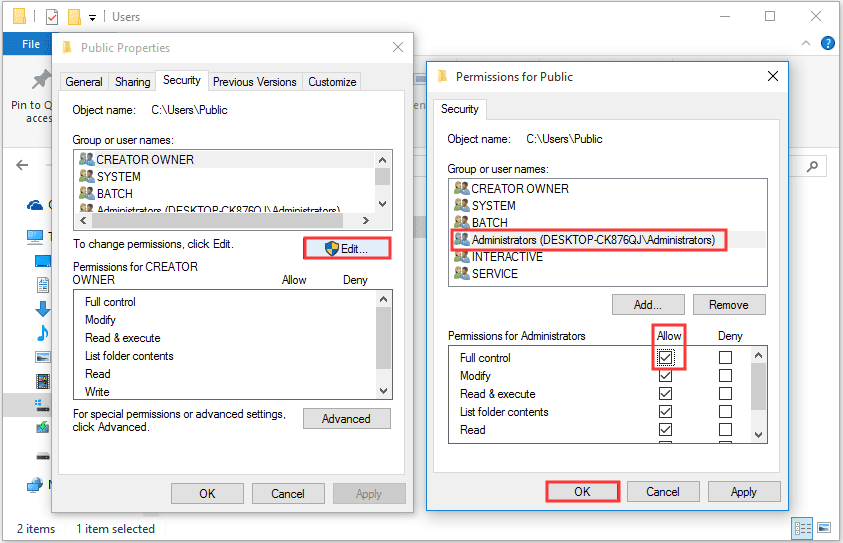
Step 4: In the User Properties window, go to the Security tab and then click Edit… to change permissions.
Step 5: In the Permission for Administrators section, check Allow for Full Control, and then click OK to save changes.
After you get the full permission to access the folder, then check if Windows 10 Explorer keeps crashing.
Solution 3: Run Netsh Winsock Reset
Running Netsh Winsock Reset can help you to solve the issue that Windows 10 Explorer keeps crashing. Follow the steps to do that:
Step 1: Open Command Prompt as administrator.
Step 2: Type netsh winsock reset in the window and then press Enter.
Step 3: Restart your computer and then check if Windows 10 Explorer keeps crashing.
Solution 4: Check Installed Add-ons
The culprit of the Windows 10 Explorer keeps crashing issue can be the installed add-ons. A number of applications install add-ons in Windows Explorer. These add-ons are very convenient, but they can also slow down or crash Windows Explorer.
Therefore, you should see whether you have installed add-ons to Windows Explorer. If there are installed add-ons, then you should disable or uninstall all third-party add-ons. And if this solution works, then you can re-enable the add-ons one by one to find the culprit.
You can use the third-party to see detailed information and then use it to disable installed add-ons.
Solution 5: Make Changes to Graphics Card Driver
Outdated graphics card drivers can cause the error that Windows 10 Explorer keeps crashing, therefore, you should update or reinstall your graphics card driver. Here is the tutorial to reinstall your graphics card driver:
Step 1: Press Win + X keys at the same time to choose Device Manager.
Step 2: Expand Display adapters in the newly pop-out window, then right-click your graphics card to choose Uninstall device.
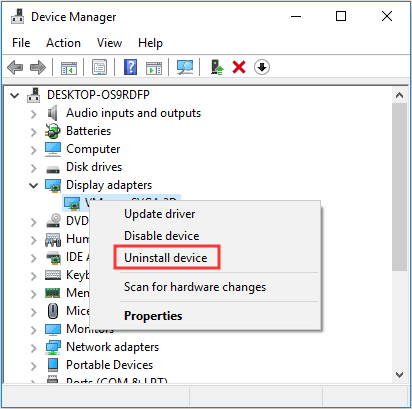
Step 3: Check Delete the driver software for this device and then click Uninstall.
Step 4: Reboot your computer, your system will automatically reinstall your graphics card.
Step 5: If Windows doesn’t reinstall your graphics card driver, then you should visit your graphics card manufacturer’s website to download the latest driver for your device.
Step 6: Open Device Manager again, click Action on the top to choose Scan for hardware changes.
After the process has finished, restart your computer to check if Windows 10 Explorer keeps crashing. If yes, try the next ones.
Solution 6: Run CHKDSK and SFC Scans
You can also try to run CHKDISK and SFC scans to solve the problem that Windows 10 Explorer keeps crashing.
Perform a Hard Disk Check
Step 1: Type cmd in the Search box and then right-click Command Prompt to choose Run as administrator. Click Yes.
Step 2: Type chkdsk /f /r in the window and then press Enter.
Step 3: Press Y key to confirm that you want to run a hard disk check when the system starts the next time and Enter key. Then exit the command line window.
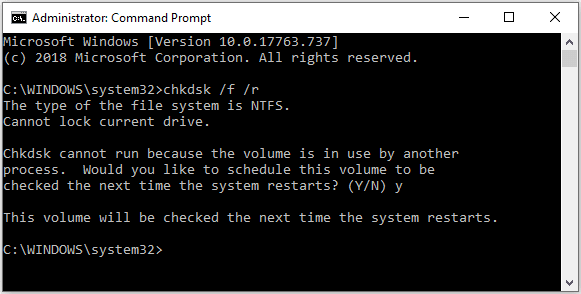
Now restart your computer to make Windows perform the hard disk check. Then check if this solves the issue that Windows 10 Explorer keeps crashing.
Perform a System File Check
If run CHKDSK doesn’t work, then you can try to perform a system file check.
Step 1: Open Command Prompt as administrator.
Step 2: Type sfc /scannow in the window and then press Enter.
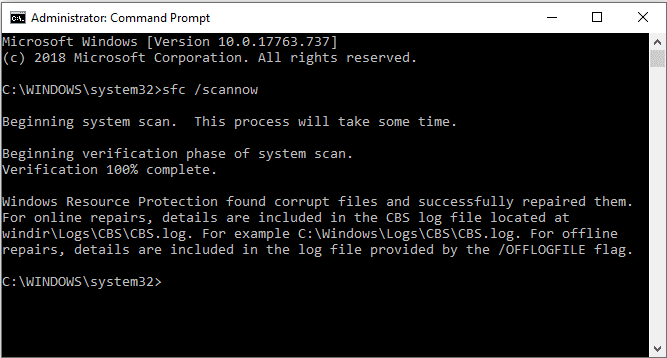
Then wait for Windows to detect whether you have damaged system files, if there are, Windows will fix them automatically.
Now restart your computer to check if Windows 10 Explorer keeps crashing, if it does, try the following methods.
Solution 7: Launch Folder Windows in a Separate Process
All File Explorer windows run in the explorer.exe process by default. Therefore, if one of the File Explorer windows crashes, then the problem that Windows Explorer keeps crashing will appear.
In order to solve the problem, you should enable the “Launch folder windows in a separate process” setting. Here is a quick guide:
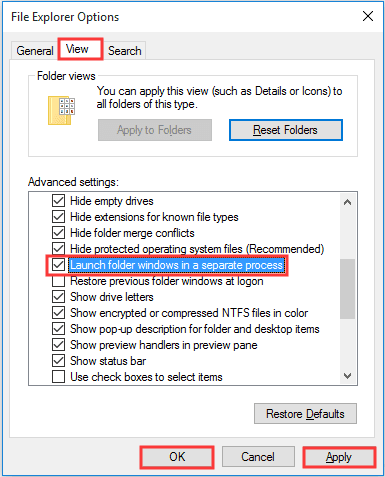
Step 1: Open File Explorer Options and then go to the View tab.
Step 2: Check Launch folder windows in a separate process and then click Apply and OK to save changes.
Solution 8: Clear File Explorer History
Clearing File Explorer history can help you to resolve the issue that Windows 10 Explorer keeps crashing. Follow the steps to do that:
Step 1: Open File Explorer Options and then go to the General tab.
Step 2: Click Clear in the Privacy section. Then File Explorer history will be cleared in seconds.
Solution 9: Disable Thumbnails
Thumbnails can be the culprit of causing Windows 10 Explorer to keep crashing, especially when there are a number of images in a folder. Thus, disabling thumbnails can be a useful solution to solve the issue that Windows 10 Explorer keeps crashing. Here is a quick guide:
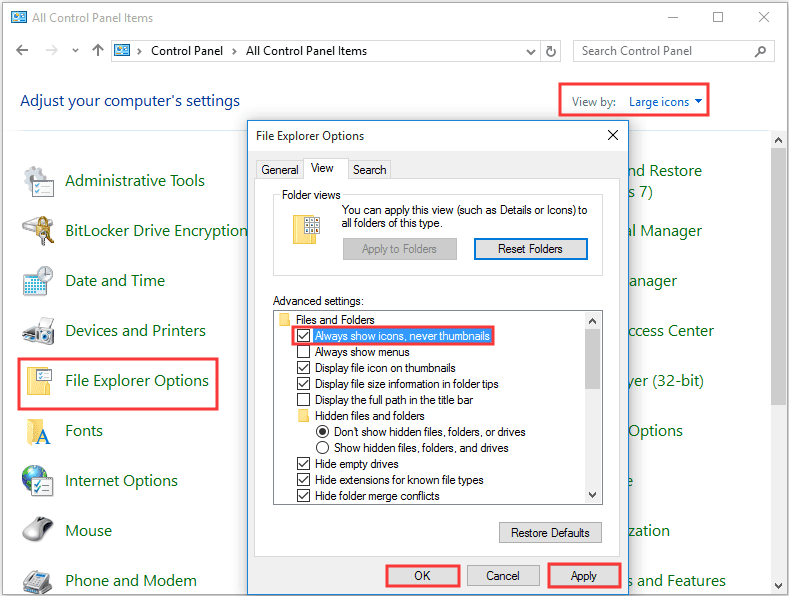
Step 1: Type control panel in the Search bar and then click Control Panel.
Step 2: Set View by: Large icons and then click File Explorer Options.
Step 3: Go to the View tab and then check Always show icons, never thumbnails. Click Apply and OK to save changes.
After disabling thumbnails, the problem that Windows 10 Explorer keeps crashing should be solved.
Solution 10: Keep Your Windows Up to Date
The first and easiest solution you can try to fix the problem is to keep your Windows up to date. Keep your operating system up to date can solve many problems related to the system.
But if you cannot ensure whether your Windows system is up to date, then follow the instructions below to check for updates:
Step 1: Press Win + I keys at the same time to open Settings and then select Update & Security.
Step 2: Choose Windows Update and then click Check for updates on the right panel.
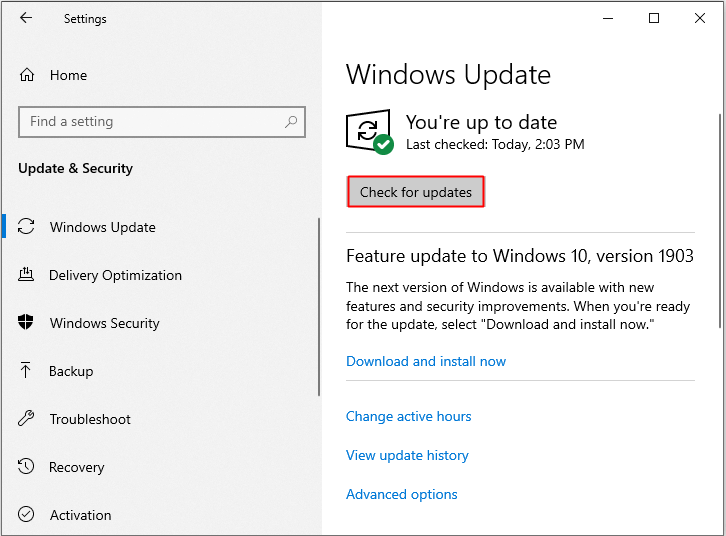
Step 3: If there are available updates, Windows will start to download them automatically. After downloading the updates successfully, restart your computer to perform the installation process.
After you have installed the up to date operating system, see whether Windows 10 File Explorer keeps crashing. If yes, try the next methods.
We hope you found all these tips helpful. If you have any questions or comments on our blog please feel free to reach out to us.
KFM Network Consulting
Email: Support@kfmcomputers.com
Office#: 815.306.4011


 Our Network Assessment gives you a clear picture of your network infrastructure. If your organization is looking to upgrade or expand your network, the first step is to understand the capabilities and shortcomings of your existing network. We can help.
Klook
January 7, 2022 6:58 pmGreat content! Keep up the good work!
romantik69.co.il
April 4, 2022 11:30 amVery nice write-up. I definitely appreciate this site. Thanks!